
Simple Guide: How to Clean Pearls That Have Yellowed
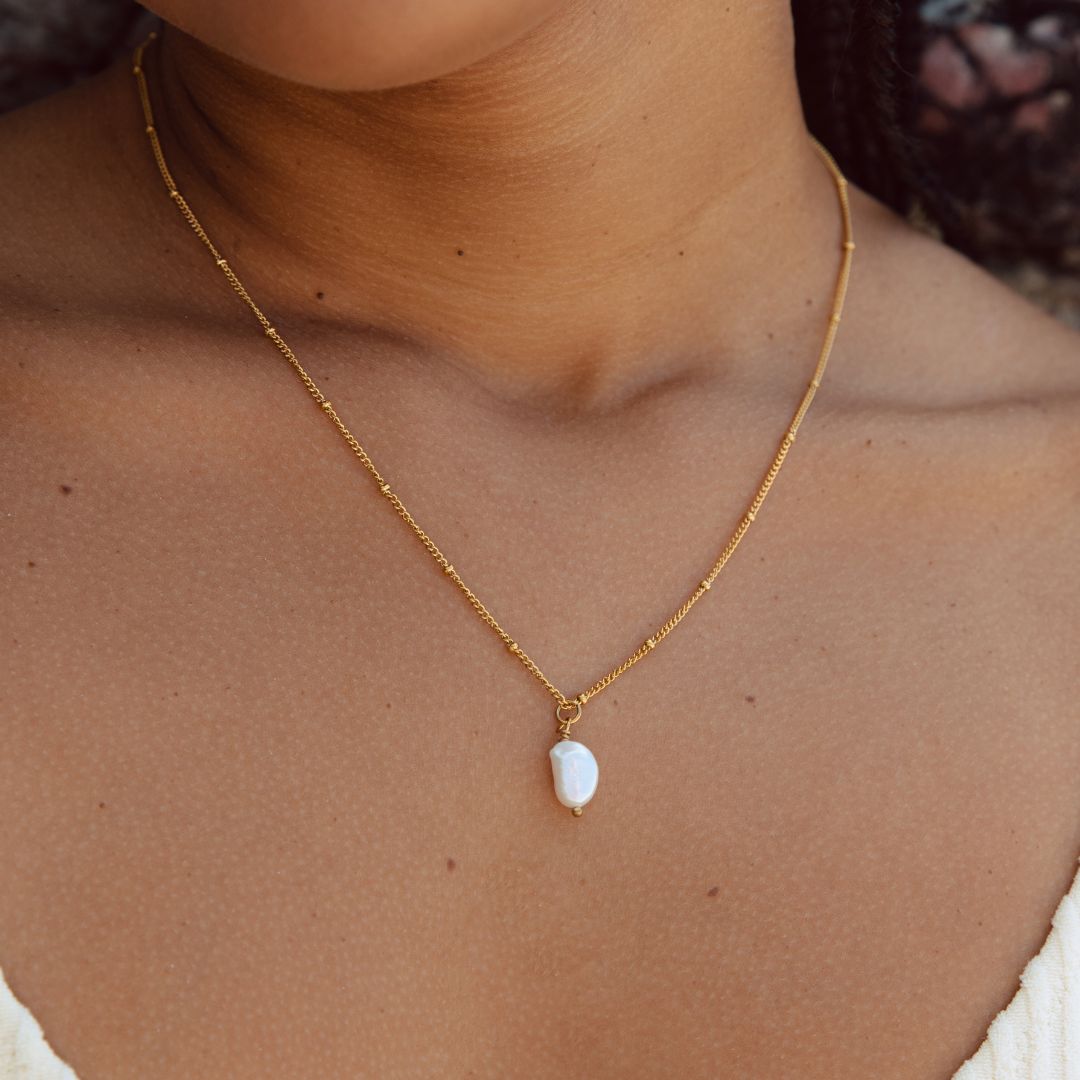
Wondering how to clean pearls that have yellowed? Start by mixing distilled water with mild soap in a 1:10 ratio and soaking the pearls in this solution for 5-10 minutes. Use a soft, lint-free cloth to gently wipe them clean, and a soft-bristled toothbrush to reach any crevices. Afterward, blot the pearls with a dry towel and allow them to air dry fully in a shaded area. To prevent future discoloration, store your pearls in a soft pouch and avoid exposing them to harsh chemicals. For persistent yellowing, professional restoration may be the best option. Check out our timeless Single Pearl Necklace collection for inspiration and tips on preserving your pearls' beauty.
Understanding Pearl Yellowing
Understanding pearl yellowing starts with recognizing the factors that contribute to this common issue. Various elements can cause yellowing in pearls, impacting their luster and overall appearance.
One of the primary causes is exposure to environmental pollutants, which can accumulate on the pearl's surface over time. Additionally, chemicals found in cosmetics, perfumes, and even skin oils can lead to discoloration, particularly if pearls aren't cleaned properly after wear.
Improper storage also plays a significant role in yellowing; pearls require a stable environment away from direct sunlight and humidity. Frequent exposure to harsh conditions can accelerate the deterioration of their natural nacre, resulting in a yellowed appearance.
Pearl care is essential to maintaining their beauty. Regularly cleaning your pearls with a soft cloth after each use helps prevent buildup, while proper storage in a soft pouch or lined jewelry box keeps them protected.
Materials You'll Need
To effectively clean yellowed pearls, you'll need specific cleaning solutions and tools designed for delicate materials.
It's also essential to follow safety precautions to protect both your pearls and yourself during the cleaning process.
Gather these materials before starting to guarantee a smooth and effective cleaning experience.
Cleaning Solutions Overview
When it comes to cleaning yellowed pearls, having the right materials at hand is essential for effective restoration.
You'll want to gather a few key cleaning solutions that are both gentle and effective. One of the best options is a mixture of distilled water and mild soap, which serves as a safe DIY solution to remove dirt and grime without damaging the pearls.
Additionally, natural remedies like white vinegar diluted with water can help lift yellowing while being gentle on the surface. Just remember to test any solution on a small area first to verify it doesn't harm your pearls.
You might also consider using a specialized pearl cleaner, which is available in many jewelry stores. These cleaners are formulated specifically for pearls and can effectively address yellowing without causing harm.
Lastly, avoid harsh chemicals or abrasive cleaners, as they can strip the nacre and further damage your pearls.
Tools for Cleaning
Cleaning yellowed pearls requires specific tools to guarantee a thorough yet gentle approach. First, gather a soft, lint-free cloth; this will be essential for the cleaning process. Microfiber cloths work best as they won't scratch the delicate surface of the pearls.
You'll also need distilled water, as it's free from impurities that could further damage your pearls. For more stubborn yellowing, consider a mild, pH-neutral soap specifically formulated for pearl care. Avoid any harsh chemicals or detergents, as these can strip away the nacre and worsen the discoloration.
A small, soft-bristled toothbrush is also useful for gently scrubbing any crevices without harming the pearls. If you prefer a more advanced cleaning method, a jewelry steamer can be beneficial, though you should only use this if you're confident in handling it safely.
Remember to have a clean, dry towel on hand to pat your pearls dry after cleaning. With these tools, you can effectively combat yellowing while ensuring your pearls maintain their luster and integrity. Proper attention to these details will help preserve your treasured pearls for years to come.
Safety Precautions Required
Before you start cleaning your yellowed pearls, it's important to take certain safety precautions to protect both yourself and your jewelry.
First, wear protective gear, including gloves and safety goggles, to shield your skin and eyes from any potential irritants in cleaning solutions. This step is vital, especially if you're using commercial cleaners that may contain harsh chemicals.
Next, make sure you're working in a well-ventilated area to minimize inhalation of any fumes. If you're using water, verify it's at a safe temperature—lukewarm is best—to avoid damaging the pearls.
When it comes to handling techniques, always grasp your pearls gently to avoid undue pressure that could cause them to crack or chip. Avoid using abrasive cloths, as these can scratch the surface. Instead, opt for a soft, lint-free cloth designed for delicate materials.
Lastly, remember to secure your workspace, keeping your cleaning supplies organized and out of reach of children or pets.
These precautions will help guarantee a smooth cleaning process while maintaining the integrity of your precious pearls.
Preparing Your Cleaning Solution
A well-prepared cleaning solution is essential for restoring the luster of your yellowed pearls without causing damage. To achieve the best results, you'll need to choose effective cleaning methods while maintaining the correct solution ratios.
Start by combining distilled water with a mild soap, preferably a gentle dish detergent. A common ratio is 1 part soap to 10 parts distilled water. This guarantees that the solution is effective yet gentle enough not to harm the pearls.
If you prefer a more natural approach, you can mix equal parts of distilled water and white vinegar, but keep in mind that vinegar can be slightly harsher.
Always test your cleaning solution on a small, inconspicuous area of the pearls first to gauge its effects. Avoid using any abrasive materials or harsh chemicals, as these can lead to irreversible damage.
Once you've prepared the solution, make certain to use it within a reasonable timeframe to guarantee its effectiveness. With the right cleaning solution in hand, you'll be ready to proceed with the next steps in restoring your pearls to their former beauty.
Cleaning the Pearls
Gently immersing the pearls in your prepared cleaning solution is the first step in the cleaning process. Confirm the solution is specifically designed for pearl maintenance, as harsh chemicals can damage the delicate surface.
Once you've submerged the pearls, allow them to soak for about 5 to 10 minutes. This soaking period helps loosen any dirt or grime.
After soaking, take a soft, lint-free cloth or a specialized jewelry cleaning cloth and gently wipe the pearls. It's vital to use a light touch to avoid scratching or removing the luster.
Pay close attention to any crevices where dirt may accumulate. If necessary, you can use a soft-bristled toothbrush dipped in the cleaning solution to delicately scrub these areas.
Always remember to clean pearls in a well-ventilated area and avoid submerging any pearl jewelry that incorporates other gemstones or materials that may not withstand the cleaning solution.
Regular pearl maintenance like this guarantees your jewelry not only retains its beauty but also lasts longer, making it an essential part of your jewelry care routine.
Drying and Polishing
Once you've cleaned your pearls, it's essential to dry them properly to prevent any damage.
Use a soft cloth to gently polish the surface, enhancing their luster without scratching.
Remember to avoid harsh chemicals, as they can degrade the pearls' quality over time.
Proper Drying Techniques
When drying cleaned pearls, it's essential to avoid harsh methods that could damage their surface. Instead, focus on gentle drying techniques that guarantee effective moisture control.
After rinsing your pearls, lay them flat on a soft, clean, and absorbent cloth. Avoid hanging them or placing them in direct sunlight, as this could lead to uneven drying and potential cracking.
To enhance moisture control, gently blot the pearls with the cloth rather than rubbing them. This approach minimizes friction and reduces the risk of surface scratches.
If you prefer using a hairdryer, set it to a cool air setting and hold it at least a foot away from the pearls. Never use heat, as it can damage the nacre.
For best results, allow your pearls to air dry completely in a cool, shaded area. Verify they aren't exposed to humidity, which can lead to dullness or discoloration.
Once dry, check for any remaining moisture in crevices and remove it gently using a soft, dry brush. Following these proper drying techniques will help maintain your pearls' luster and prolong their beauty.
Soft Cloth Polishing
Polishing your pearls with a soft cloth can greatly enhance their shine and remove any lingering dust or oils. To achieve the best results, choose the right soft cloth types, such as microfiber or 100% cotton. These materials are gentle enough to prevent scratching the delicate surface of your pearls while effectively lifting away impurities.
Begin by confirming your pearls are completely dry before polishing. Use a clean, dry soft cloth and gently wipe each pearl individually, employing circular motions. This polishing technique not only removes surface buildup but also helps restore luster. Be cautious around knots and stringing material, as excessive pressure may loosen them.
If the pearls have significant yellowing or discoloration, consider applying a bit of water to the cloth, but verify it's damp, not wet. This technique can help lift stubborn residues while still being gentle on the pearls.
After polishing, allow your pearls to air dry completely before storing them. Regular polishing with the right techniques will keep your pearls looking vibrant and radiant for years to come.
Avoiding Harsh Chemicals
Since harsh chemicals can damage the delicate structure of pearls, it's crucial to avoid using them during the drying and polishing process.
Instead, opt for natural alternatives that provide effective cleaning without compromising the integrity of your pearls.
When drying your pearls, use a soft, lint-free cloth to gently pat them dry after cleaning.
Avoid exposing them to direct sunlight or heat sources, as these can further yellow the pearls.
Instead, allow them to air dry in a cool, shaded area.
For polishing, stick to gentle methods.
A microfiber cloth works well for this purpose, as it's soft enough to prevent scratches while effectively removing surface dust.
If you notice persistent yellowing, consider using a mixture of distilled water and a few drops of mild soap, ensuring it's well diluted.
Always test any solution on a small, inconspicuous area first.
Preventing Future Discoloration
To keep your pearls looking their best and prevent future discoloration, you should store them properly and handle them with care.
Start by using appropriate storage methods. Always place your pearls in a soft pouch or a lined jewelry box to avoid scratches and physical damage. Avoid storing them in plastic, as it can trap moisture and lead to discoloration. Instead, opt for breathable materials.
Environmental factors play a considerable role in maintaining your pearls' luster. Keep them away from direct sunlight, as UV rays can cause yellowing over time. Additionally, avoid exposing your pearls to extreme temperatures and humidity, which can accelerate deterioration.
It's also essential to remove your pearls before applying perfumes, lotions, or hairsprays, as these products can contain chemicals that lead to discoloration.
Regular maintenance is crucial. Wipe your pearls with a soft, damp cloth after wearing them to remove any perspiration or residue. This simple step can help preserve their natural beauty.
When to Seek Professional Help
Even with proper care and maintenance, there may come a time when your pearls require professional assistance. If your pearls have yellowed and at-home cleaning methods fail to restore their luster, it's essential to seek a professional assessment. Yellowing can indicate deeper issues, such as damage to the nacre or exposure to harsh chemicals that may not be evident to the untrained eye.
When considering expert restoration, look for jewelers specializing in pearl care. They possess the necessary tools and expertise to evaluate the condition of your pearls accurately. A professional can safely clean and treat your pearls, using methods that won't further damage them.
If you notice significant discoloration, cracks, or visible wear, delaying professional help may lead to irreversible damage.
Additionally, if your pearls have sentimental value, investing in expert restoration can preserve their beauty for years to come. Don't hesitate to take your pearls to a qualified jeweler when you notice signs of deterioration.
Timely intervention can guarantee that your pearls remain a cherished part of your collection, maintaining their elegance and charm.
Frequently Asked Questions
Can I Use Vinegar to Clean Yellowed Pearls?
You shouldn't use vinegar to clean yellowed pearls. A vinegar solution can damage the pearls, compromising their luster. Prioritize pearl preservation by using gentle cleaning methods specifically designed for delicate surfaces. Always proceed with caution.
How Often Should I Clean My Pearls?
You should clean your pearls every few months, depending on wear. Always store them properly to prevent damage. Utilize gentle pearl cleaning methods to maintain their luster and avoid harsh chemicals that can cause deterioration.
Will Cleaning Remove Any Value From My Pearls?
Cleaning your pearls using proper techniques won't diminish their value if done carefully. Prioritizing pearl preservation guarantees they maintain their luster and integrity, safeguarding both their beauty and monetary worth for the long term.
Can Sunlight Cause My Pearls to Yellow Further?
Yes, sun exposure can cause your pearls to yellow further. For ideal pearl care, store them in a cool, dark place, and avoid leaving them in direct sunlight to maintain their luster and color.
Conclusion
By following these steps, you can effectively clean yellowed pearls and restore their natural luster. Regular maintenance and gentle cleaning will help prevent future discoloration, ensuring your pearls remain beautiful for years to come. If you notice persistent yellowing or damage that you can't address, don't hesitate to seek professional help. With proper care, your pearls can continue to be a stunning addition to your jewelry collection.










Leave a comment
This site is protected by hCaptcha and the hCaptcha Privacy Policy and Terms of Service apply.