
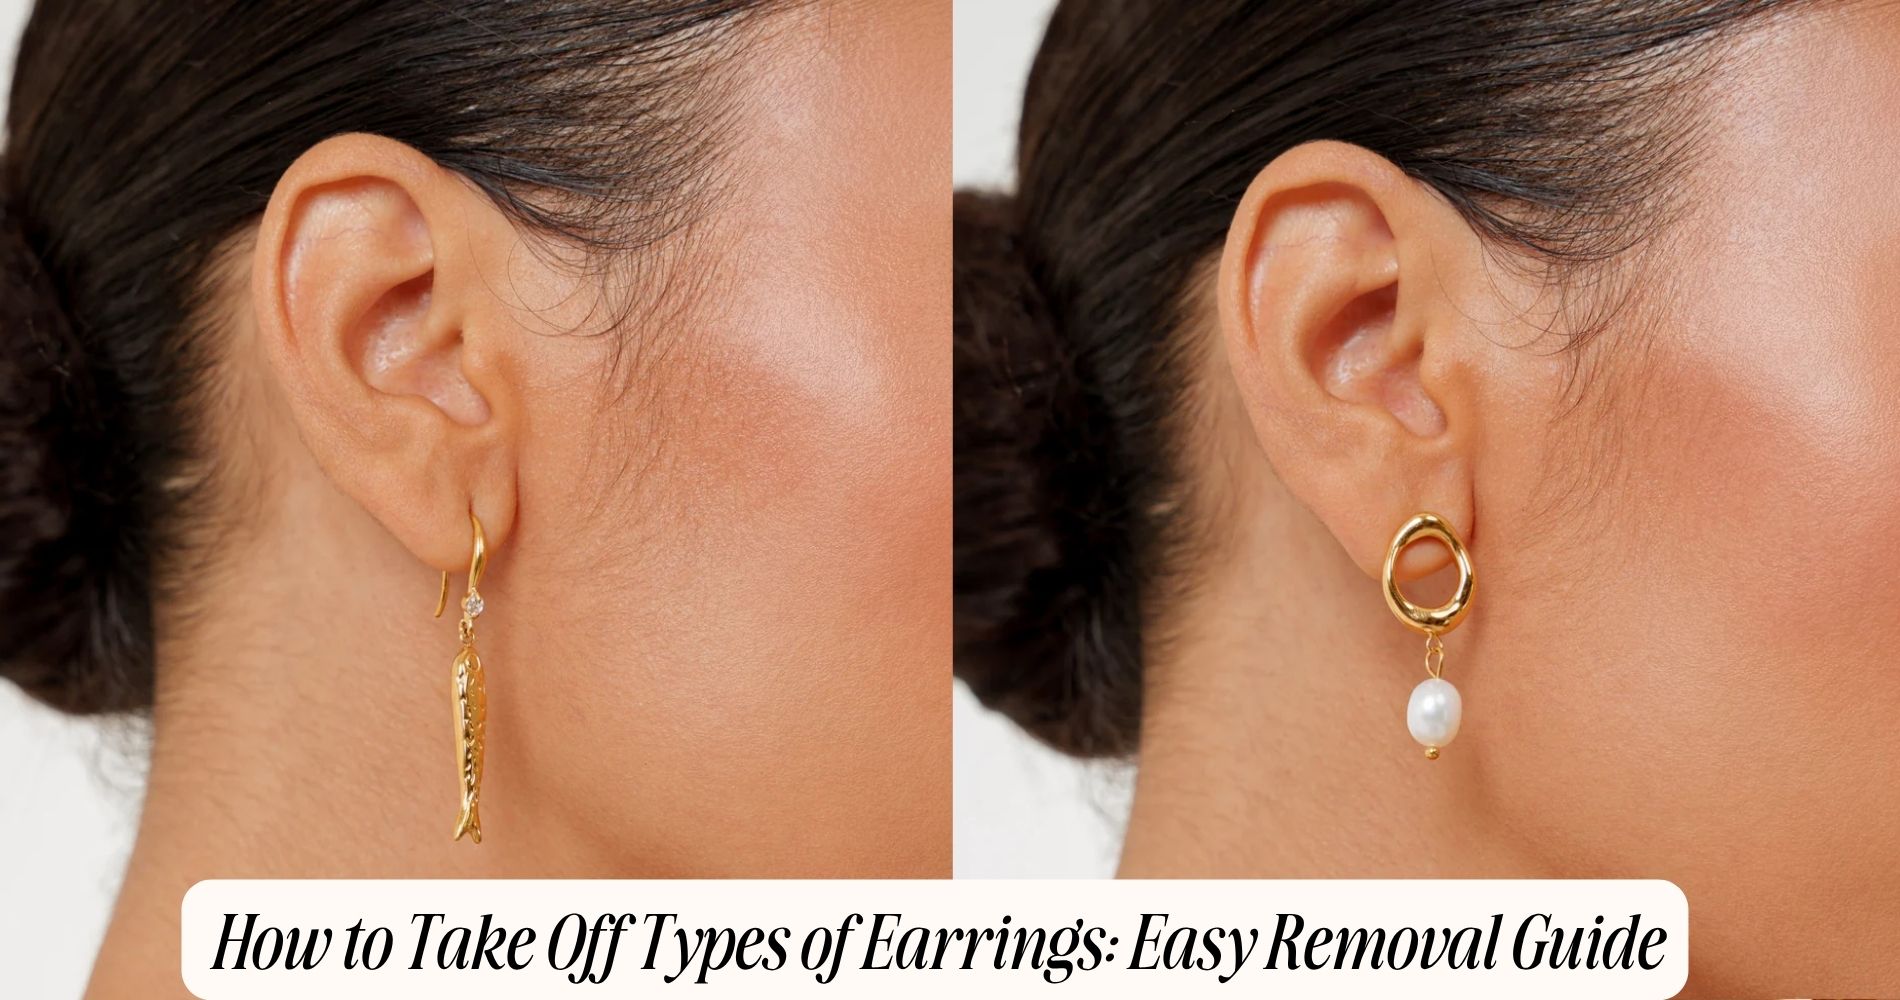
How to Take Off Types of Earrings: Easy Removal Guide
Different earring closure types require different removal techniques, and using the wrong approach on the wrong closure causes unnecessary pain, bent posts, and damaged mechanisms. Knowing how to take off types of earrings correctly, whether a flat back labret, a hinged huggie, a threader, or a screw back, protects both the earring and the piercing each time. Waterproof Earrings in flat back and hinged hoop styles are among the closures people most commonly ask about. This guide covers every major earring closure type with specific step-by-step removal instructions, what to do when a closure is stuck, and how to handle removal for new or sensitive piercings.
Why Earring Removal Technique Matters
Using the wrong technique for a specific closure damages the earring and the piercing in ways that accumulate over time. Pulling a flat back labret from the front before unthreading it stretches the piercing channel. Forcing a hinged hoop open by bending the wire instead of releasing the hinge weakens the metal at the bend. Twisting a screw back in the wrong direction tightens it further rather than releasing it.
Beyond the mechanics, removal technique matters for hygiene. Clean hands before touching any earring or piercing reduce bacterial transfer to the piercing site. A mirror and good lighting prevent the fumbling that leads to unintended pressure on the lobe and post.
Before removing any earring, wash your hands thoroughly. Work in front of a mirror with sufficient light so you can see exactly what you are doing rather than working entirely by feel.

How to Take Off Types of Earrings: Closure by Closure
Butterfly Back Studs
Butterfly backs, also called push backs or friction backs, are the most common earring closure and the one most people learn to remove first.
How to remove:
Hold the front of the earring face gently but firmly between the thumb and index finger of one hand. With the other hand, pinch the butterfly back between thumb and index finger and pull it straight back along the post axis. The back should slide off with steady backward pressure without requiring force.
If the back feels tight, avoid pulling at an angle, which bends the post and makes removal harder. Apply steady backward pressure directly along the post line. A very small amount of gentle side-to-side wiggling while pulling backward releases a back that has tightened slightly on the post.
Common mistake: Pulling the back downward rather than straight back. This bends the post and creates a gap in the butterfly back mechanism that makes it less secure in future use.
Flat Back Labret Studs
Flat back labrets are increasingly common in quality everyday earrings. The flat disc sits behind the ear against the lobe and the decorative front piece threads or presses onto the front of the post.
How to remove a threaded flat back:
The front piece unscrews counterclockwise when viewed from the front. Hold the flat back disc firmly against the rear of the lobe with one hand to keep the post stable. With the other hand, grip the front piece and turn it counterclockwise. It will unscrew and slide forward off the post. Once the front piece is removed, the post and flat back slide out through the front of the piercing.
How to remove a threadless flat back:
Threadless labrets use a push-fit pin rather than a threaded post. The front piece is held in place by a slight bend in the pin that creates tension inside the post tube. To remove, hold the flat back disc stable from the rear and pull the front piece straight forward with a smooth, steady pull. It releases with a small pop or click as the pin bend clears the tube.
Common mistake: Trying to push the flat back through the front of the ear rather than unscrewing or pulling the front piece off first. This tears the piercing. Always remove the front piece before sliding the post out.
Huggie Hoops
Huggie hoops use a hinged mechanism with a small post that locks into a receiving notch on the opposite side of the hoop.
How to remove:
Locate the hinge on one side of the huggie: a small barrel or joint where the two halves of the hoop connect. On the opposite side is the closure post, a small pin that clicks into a notch or hole in the hoop body. To open, press the closure post gently inward and downward from above to release it from the notch, then swing the post-end of the hoop downward away from the lobe. The hoop will pivot open on the hinge. Slide the hoop down and out of the piercing.
Common mistake: Trying to pull the hoop open sideways, which puts lateral stress on the hinge rather than releasing the closure mechanism. Always press the post to release it before opening.

Standard Hoops (Wire Through Catch)
Open hoops where a wire passes through the piercing and catches on a small hook, notch, or tube on the opposite end require a specific release technique.
How to remove:
Hold the hoop with both hands, one finger on each side of the closure point. Identify which end is the catch (a small hook or tube) and which is the wire end. Press the wire end slightly inward toward the center of the hoop to release it from the catch, then swing the wire end away from the catch and slide the hoop down and out of the piercing.
Common mistake: Pulling the hoop directly outward without releasing the catch first, which bends the wire at the catch point and eventually weakens it until it breaks.

Screw Back Studs
Screw backs thread onto the post and provide more secure retention than butterfly backs. They are common in higher-quality diamond and stone earrings.
How to remove:
Hold the earring face from the front with one hand to keep the post stable. With the other hand, grip the screw back and turn it counterclockwise. It will unscrew gradually and slide off the post. If the back feels tight, ensure you are turning counterclockwise rather than clockwise, which tightens rather than releases. Steady rotational pressure counterclockwise will release even a tight screw back.
Common mistake: Turning clockwise when the back feels stuck. This tightens the mechanism further and makes removal increasingly difficult. If you are unsure of direction, try both briefly: counterclockwise loosens and the back will feel like it has more give in that direction.
Threader Earrings
Threader earrings pass a fine chain directly through the piercing rather than using a post and back mechanism. They have no closure to release: removal is simply the reverse of insertion.
How to remove:
Hold the decorative end of the threader between two fingers. Locate where the chain exits the back of the piercing. Pull the decorative end gently forward through the piercing in one smooth motion, guiding the chain through until it is fully out. Do not pull at an angle, which creates friction between the chain and the piercing channel walls.
Common mistake: Pulling quickly or at an angle, which causes the chain to catch inside the piercing channel and requires patient, slow repositioning to release.
Clip-On Earrings
Clip-ons attach through spring tension against the earlobe rather than through a piercing. Removal is straightforward but technique prevents earlobe soreness from extended wear.
How to remove:
Locate the hinged paddle or spring mechanism on the back of the clip. Press the paddle inward toward the earring face to release the spring tension while simultaneously tilting the back of the earring away from the lobe. The clip releases from the earlobe without pulling or pinching the skin.
Common mistake: Pulling the earring straight off without releasing the spring mechanism first, which drags the clip against the lobe and causes the pinching sensation most people associate with clip-on removal.
What to Do When an Earring Is Stuck
Earrings stick for a few specific reasons, each with a targeted solution.
Swollen lobe from a new or irritated piercing. A swollen lobe reduces the clearance around the post and can make a flat back feel embedded. Do not force removal. Apply a cold compress to the lobe for five minutes to reduce swelling before attempting removal again. If the back appears to be embedded in the tissue, do not attempt home removal and consult a piercer or healthcare provider.
Tightened screw back. A screw back that feels impossible to turn counterclockwise may have tightened from vibration or been overtightened when inserted. Hold the post from the front as firmly as possible to prevent it from spinning with the back, and apply slow, steady counterclockwise pressure. Rubber-grip surfaces like the textured edge of a latex glove provide extra grip on a small screw back.
Corroded or tarnished post. A post that has corroded from a reactive base metal can feel rough and sticky inside the piercing, making removal more difficult and uncomfortable. Applying a small amount of gentle unscented oil around the front of the piercing before attempting removal lubricates the channel. Switching to a non-reactive post material like surgical steel or titanium prevents this from recurring.
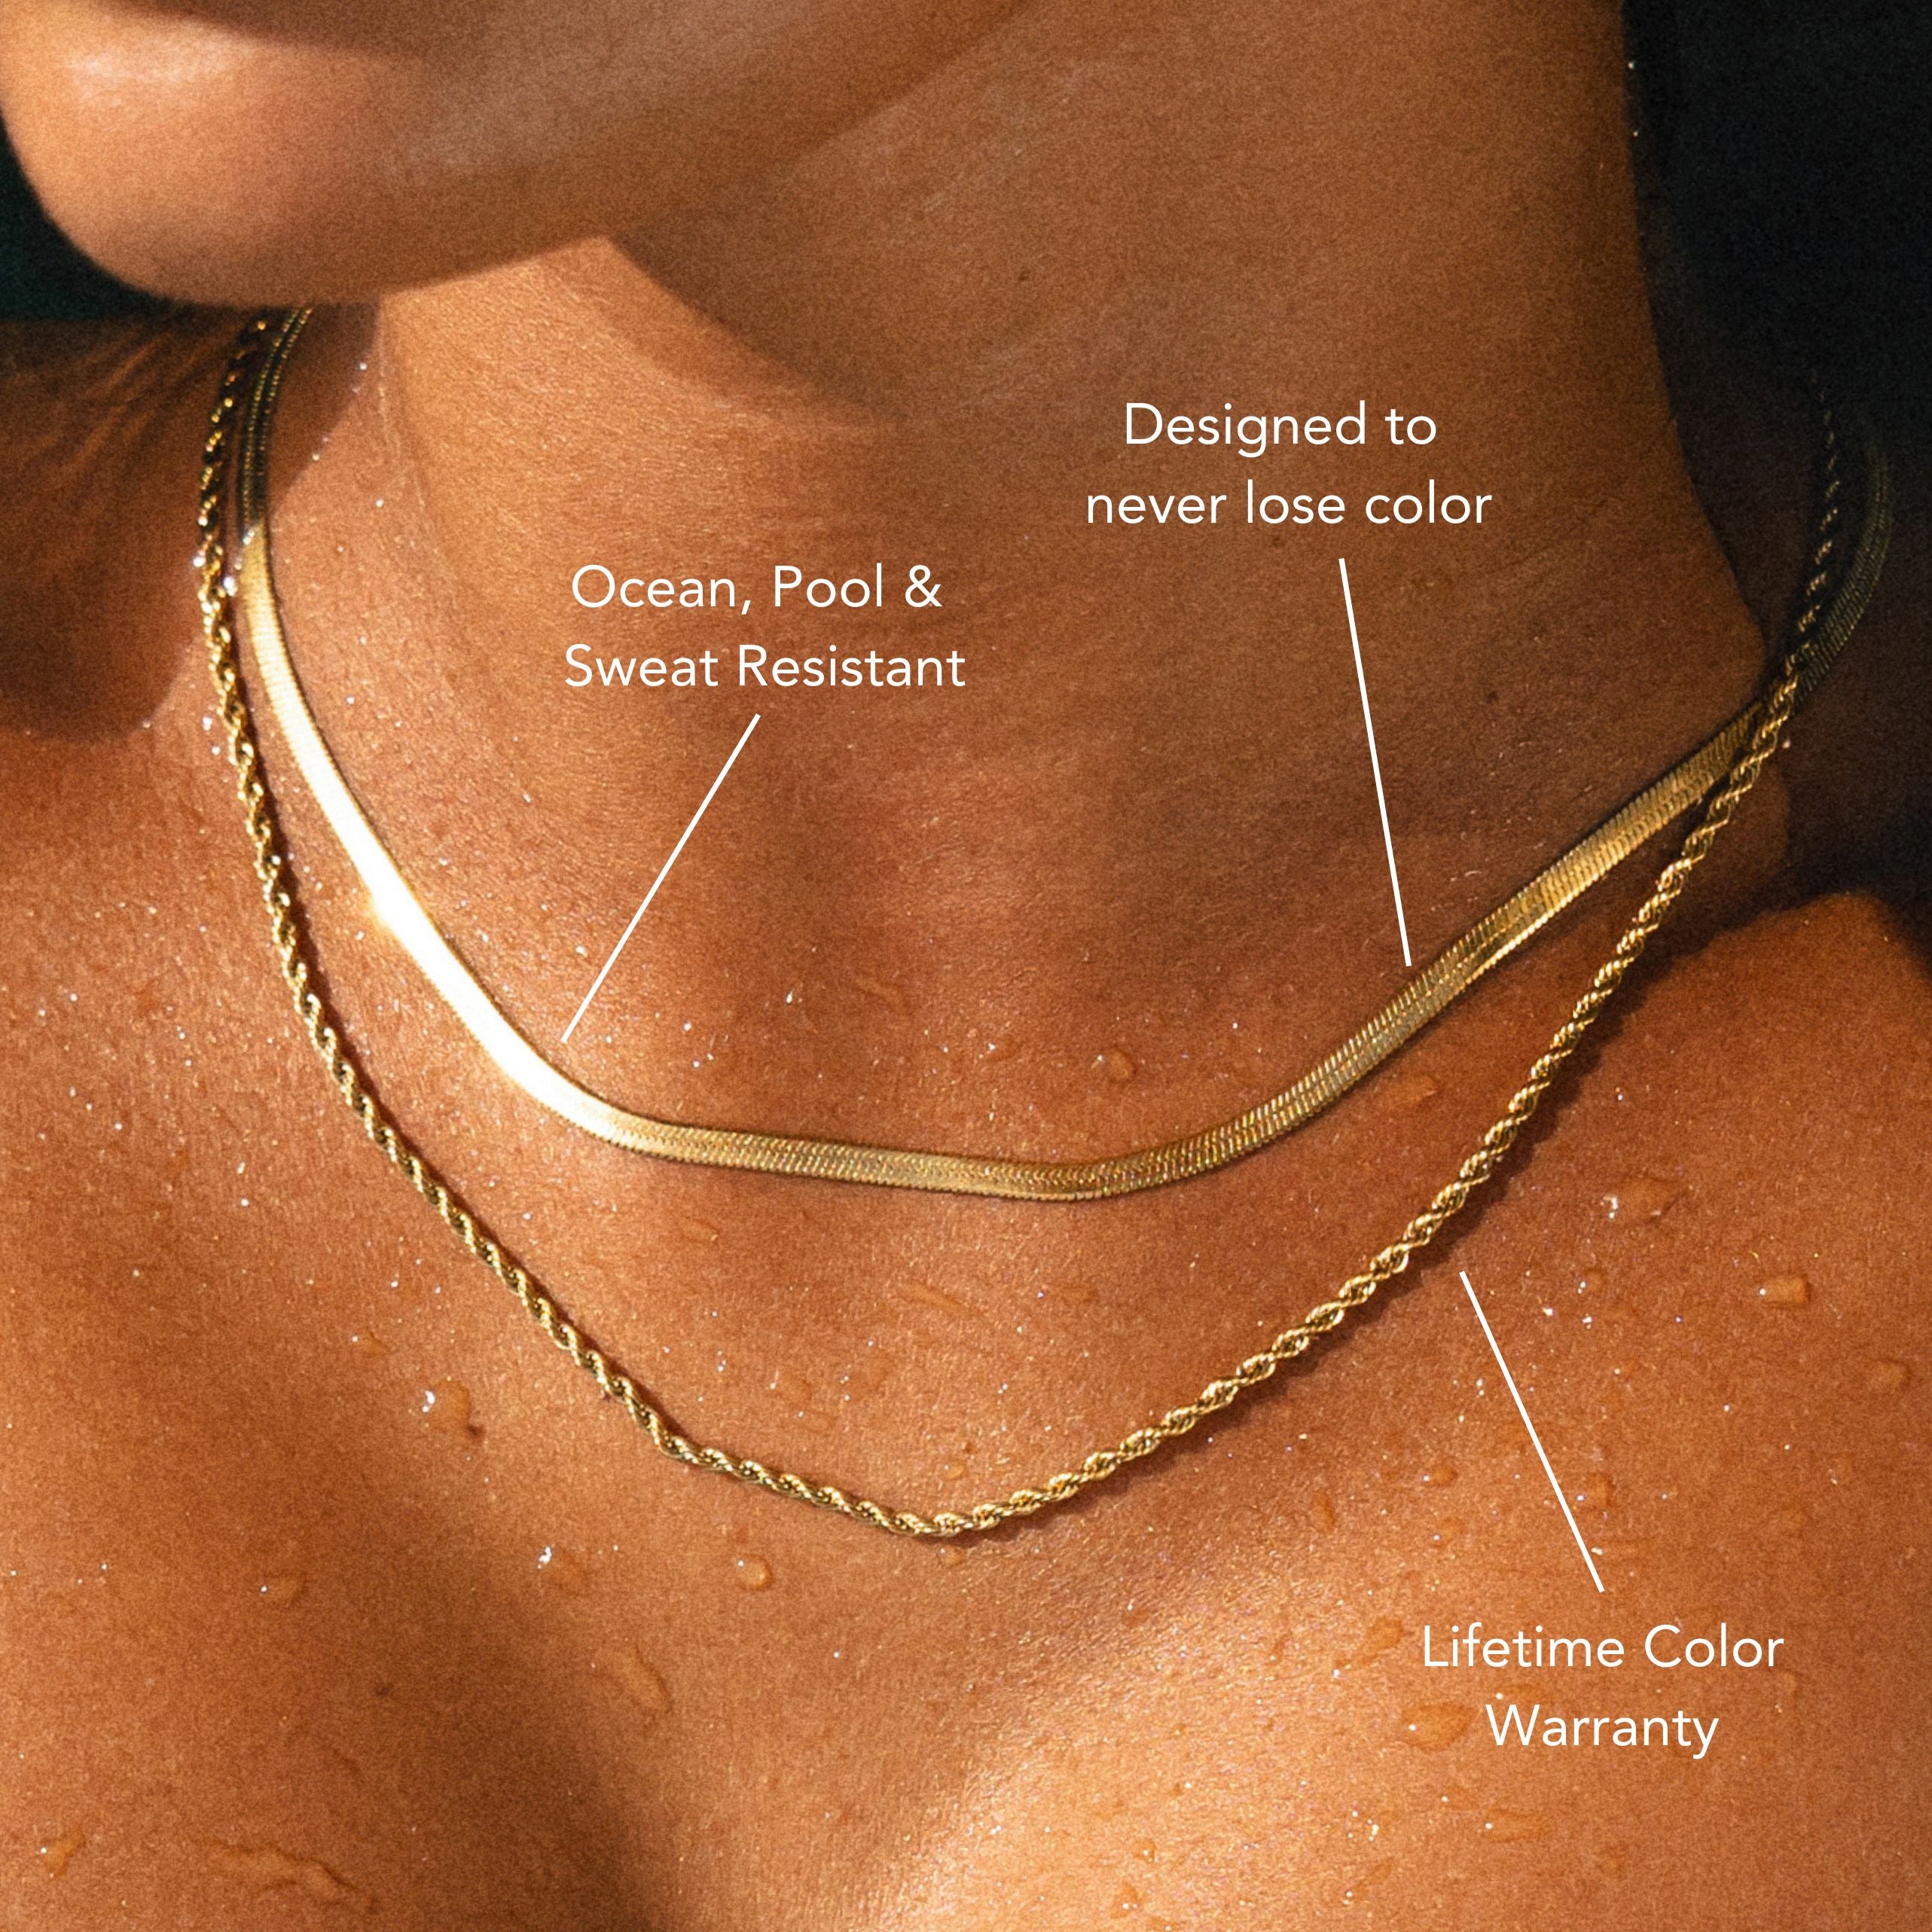
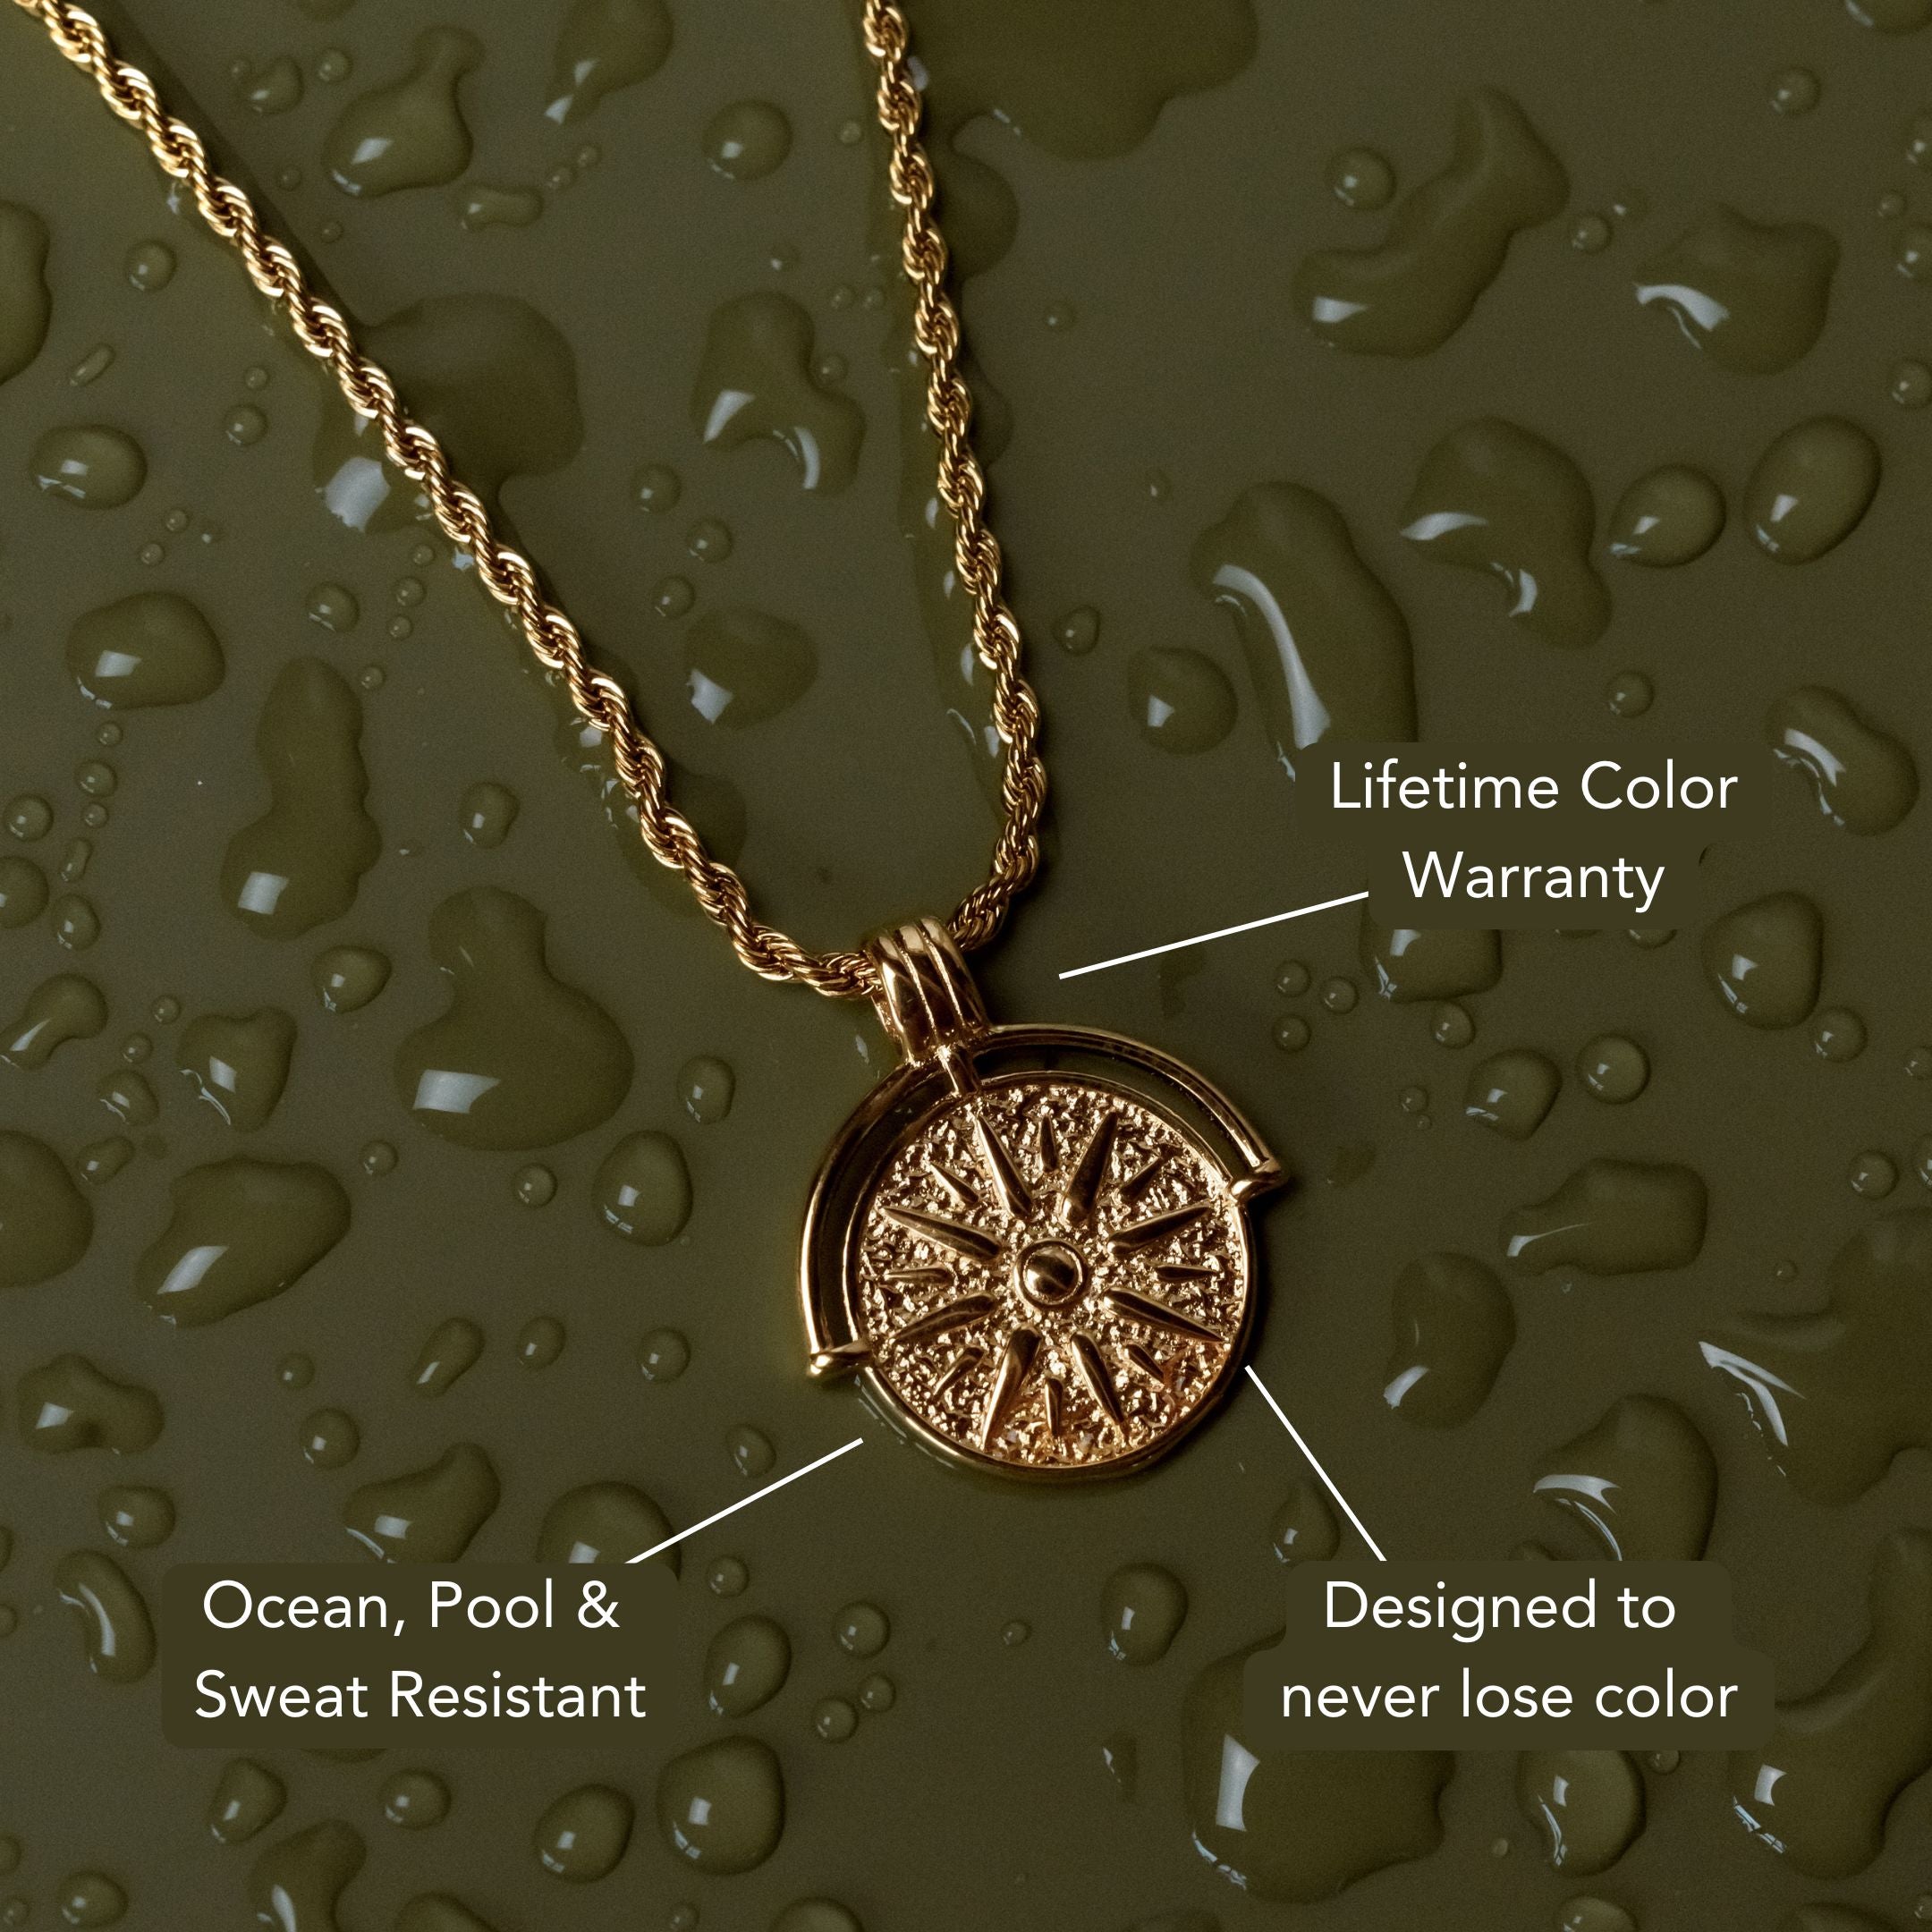
For earrings worn continuously through showers, gym sessions, and daily activity, PVD-coated stainless steel posts remain smooth and non-reactive inside the piercing over time, which means they slide in and out cleanly without the resistance that corroded posts develop. ATOLEA's waterproof earring range includes flat back and huggie styles in PVD-coated 316L stainless steel, with a lifetime color warranty on every piece.

Frequently Asked Questions
How do you take off flat back earrings?
For threaded flat backs, hold the flat disc behind the ear steady and unscrew the front piece counterclockwise. For threadless flat backs, hold the back steady and pull the front piece straight forward until it pops off. Once the front piece is removed on either type, the post and flat back slide out through the front of the piercing. Never push the post backward through the piercing before removing the front piece.
How do you open huggie hoop earrings?
Find the small closure post on one side of the huggie, opposite the hinge. Press this post gently inward and downward to release it from its notch, then swing it away from the hoop body. The hoop pivots open on the hinge. Avoid pulling the hoop sideways, which stresses the hinge rather than releasing the closure.
Why is my earring back stuck?
Stuck earring backs usually result from one of three causes: swelling in a new or irritated piercing, a screw back turned the wrong direction, or corrosion on a reactive post creating friction inside the piercing. For swelling, apply cold first. For a screw back, confirm counterclockwise is the release direction. For a corroded post, a small amount of oil at the front of the piercing lubricates the channel. Embedded backs should be addressed by a piercer rather than forced at home.
How do you take off hoop earrings without bending them?
Release the closure mechanism before opening the hoop. For wire-through-catch hoops, press the wire inward to free it from the catch before swinging it open. For hinged closures on huggies, press the post to release it from the notch before pivoting the hoop open. Opening either style by pulling outward without releasing the mechanism first bends the wire or strains the hinge.
How do you remove a screw back earring?
Hold the front of the earring face steady from the front to prevent the post from spinning. Turn the back counterclockwise. If it feels stuck, confirm the direction: clockwise tightens, counterclockwise loosens. Apply steady rotational pressure counterclockwise rather than increasing force. A textured grip surface like a rubber glove edge helps if the back is very small and smooth.
Conclusion
How to take off types of earrings without pain or damage comes down to identifying the closure type first, then applying the specific technique that releases that mechanism rather than forcing it. Butterfly backs slide straight back. Flat back fronts unscrew or pull forward before the post slides out. Huggie hoops release at the closure post before pivoting open. Screw backs turn counterclockwise. For stuck closures, addressing the specific cause, swelling, direction confusion, or post corrosion, resolves the problem without damaging the piercing or the earring.


Leave a comment
This site is protected by hCaptcha and the hCaptcha Privacy Policy and Terms of Service apply.