
How to Set Pearls in Jewelry Without Breaking Them
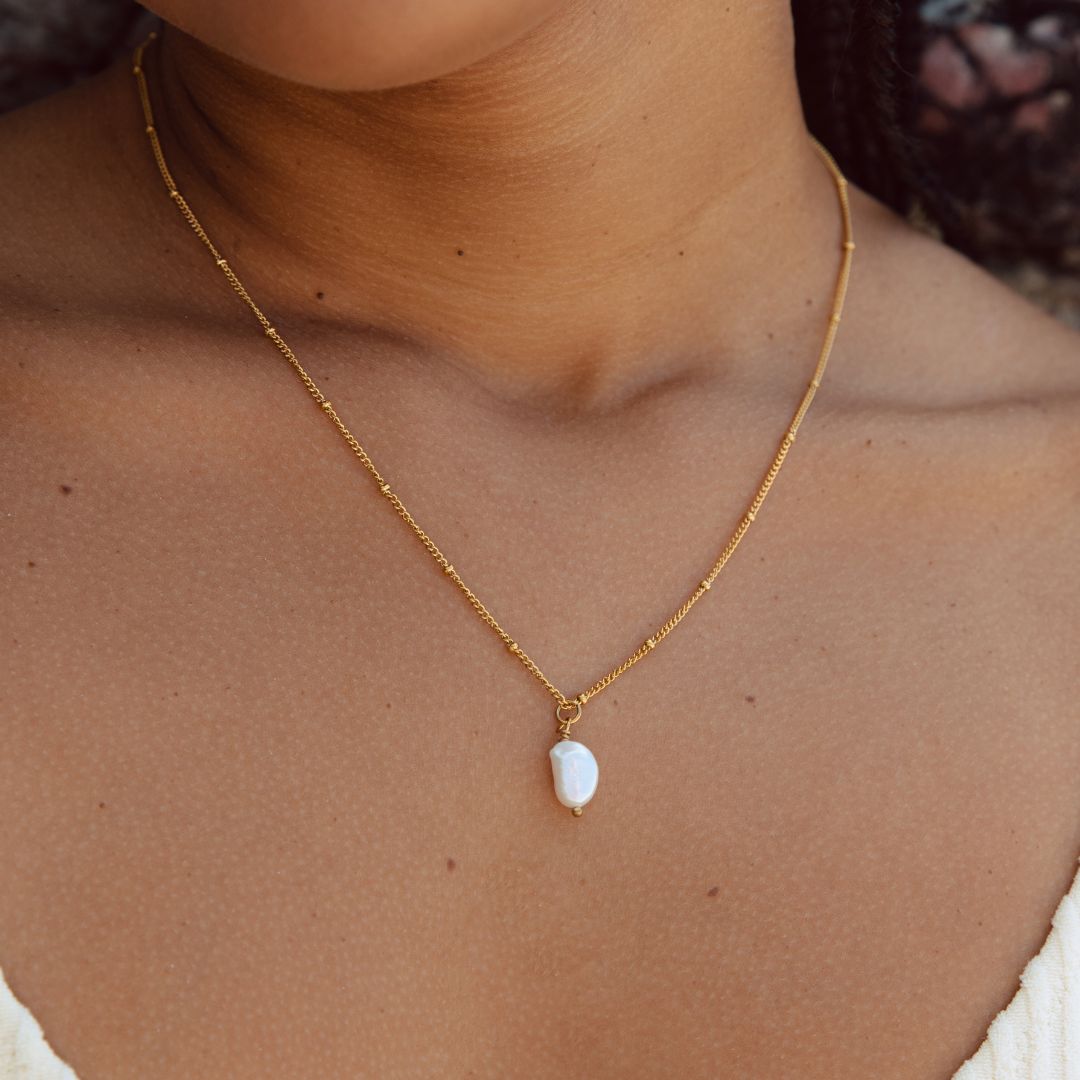
If you’re wondering how to set pearls in jewelry without damaging their delicate surface, the key is to use gentle tools and proper techniques. Since nacre is soft and prone to scratches, avoid abrasive materials and apply only light pressure. Opt for a cradle-style setting—like a cup-and-peg—for better support, and use a high-quality two-part epoxy adhesive for a lasting bond. Be sure to clean and dry both the pearl and its mount before setting, steering clear of harsh chemicals and ultrasonic cleaners. For more tips and inspiration, explore our Freshwater Pearls Jewelry collection, where craftsmanship meets care.
Understanding Pearl Structure and Vulnerabilities
Although pearls possess a lustrous allure, their structure is fundamentally delicate, comprised of concentric layers of nacre formed around an irritant.
When you examine pearl anatomy, you'll notice that each layer is microscopically thin, creating a surface that's both beautiful and susceptible to abrasion and impact. The low Mohs hardness (2.5-4.5) means pearls can scratch or chip easily if mishandled.
Moisture, acids, and abrupt temperature shifts further compromise pearl durability by weakening the nacre, causing dullness or surface flaking.
To preserve structural integrity, avoid exposing pearls to harsh chemicals or ultrasonic cleaning. Always handle pearls with non-abrasive tools and gentle pressure.
Choosing the Right Setting for Pearls
Given pearls’ inherent fragility, selecting an appropriate setting becomes paramount to both safeguard the gem and showcase its luster.
Opt for settings that cradle rather than clamp, such as cup-and-peg or bezel mounts, which distribute pressure evenly and minimize risk of surface fractures.
Consider the pearl shape—round pearls fit well in symmetrical cup settings, while baroque shapes require custom mounts that follow their contours.
Evaluate pearl color against the metal; white pearls often complement platinum or white gold, whereas golden or black pearls pair elegantly with yellow or rose gold.
Always verify the setting’s design allows best light reflection, maximizing the pearl’s iridescence.
Avoid prong settings or any design that might exert uneven force, which could crack or chip the nacre.
Selecting Appropriate Adhesives and Materials
When setting pearls, you must select adhesives specifically formulated for delicate organic gemstones to guarantee both secure attachment and long-term preservation.
Opt for high-quality, two-part epoxy adhesives, as they offer superior bonding strength without generating excessive heat, which can damage pearls. Look for formulas labeled as safe for use with organic materials or pearls.
Avoid cyanoacrylate glues, which can become brittle and compromise the bond over time. Alternatively, you may use natural resins like shellac, valued for their traditional use and compatibility with organic gems.
Ascertain the adhesive’s curing time provides ample working window for precise adjustments, but cures fully to prevent moisture infiltration.
Always verify that all materials in contact with the pearl are acid-free, non-reactive, and free of harsh solvents.
Preparing the Pearl and Jewelry Mount
After selecting an appropriate adhesive, focus on meticulous preparation of both the pearl and the jewelry mount to guarantee ideal adhesion and longevity.
Begin pearl preparation by carefully cleaning the pearl's drill hole with a lint-free cloth and isopropyl alcohol. Remove all residues, such as oils, dust, or manufacturing debris, as these compromise bonding strength.
Next, inspect the jewelry mount for irregularities or leftover debris from previous settings. Use a jeweler’s loupe to check for burrs or uneven surfaces inside the mount’s cup or peg. Smooth rough edges with fine-grit emery paper if necessary.
Ascertain the mount’s cavity matches the pearl’s contours for a flush fit. Always dry both components thoroughly before proceeding, as moisture inhibits adhesive effectiveness and long-term stability.
Using Proper Tools to Prevent Damage
Several specialized tools are essential for setting pearls without causing scratches, chips, or cracks. Use non-marring tweezers—preferably with silicone or nylon tips—to handle pearls safely, avoiding direct contact with metal.
Opt for soft-jaw pliers when adjusting settings, as they minimize surface abrasion. A pearl drilling vice offers stability if minor hole adjustments are needed. Always select tool types specifically designed for delicate surfaces; standard metal tools can easily damage nacre.
Tool maintenance is equally important. Inspect and clean your tools before each use to remove debris or sharp edges that might scratch the pearl.
Replace worn or damaged tool tips promptly to guarantee smooth handling. By combining proper tool types with diligent tool maintenance, you’ll protect the pearl’s luster and structure throughout the setting process.
Step-by-Step Guide to Gluing Pearls Securely
Two critical factors—adhesive selection and surface preparation—determine the integrity of a glued pearl setting.
Start by thoroughly cleaning both the pearl and the jewelry mounting with isopropyl alcohol to remove oils or dust, ensuring ideal adhesion.
Select a jewelry-grade epoxy or a two-part adhesive as your primary adhesive options; these provide strong, long-lasting bonds without damaging the pearl’s nacre.
Using precise gluing techniques, apply a minimal amount of adhesive to the post or cup, avoiding excess that could ooze or mar the pearl’s surface.
Gently seat the pearl, aligning it correctly before the adhesive sets.
Maintain steady pressure for a few minutes, then allow the assembly to cure undisturbed per manufacturer recommendations, ensuring a secure, professional finish for your pearl jewelry.
Tips for Drilling Pearls Safely
While proper gluing techniques assure pearls remain firmly set, some jewelry designs require drilling pearls for threading or mounting on posts.
To employ ideal drilling techniques and guarantee pearl preservation, always secure the pearl in a soft, non-slip vise to prevent crushing. Use a micro drill with a sharp, fine diamond bit; apply steady, minimal pressure, and keep the rotation speed low to avoid generating heat that can cause cracks.
Submerge the pearl partially in water during drilling to reduce friction and dissipate heat. Begin with a pilot hole before enlarging to the desired diameter. Frequently withdraw the drill to clear debris and inspect for signs of stress.
Limit drilling depth to maintain structural integrity and prevent splitting or chipping of the nacre.
Securing Pearls in Prong and Bezel Settings
A secure pearl setting relies on precise adaptation of prongs or bezels to the pearl’s contours without imposing excessive pressure on its delicate nacre.
When using prong settings, shape and position each prong to gently cradle the pearl, ensuring even contact and minimal movement. Avoid over-tightening, which can crack or craze the surface.
For bezel settings, custom-form the metal rim to follow the pearl’s outline, allowing for a snug yet non-constrictive fit. Employ a soft, non-abrasive lining, like a thin nylon or felt pad, between the pearl and metal to buffer direct contact.
Always use jewelers’ epoxy or traditional setting cement sparingly to anchor the pearl if needed, taking care not to let adhesive seep onto visible nacre.
Caring for and Maintaining Set Pearls
Proper maintenance guarantees your set pearls retain their luster and structural integrity for decades.
For cleaning pearls, use a soft, damp microfiber cloth after each wear to remove body oils and surface contaminants. Avoid ultrasonic cleaners, harsh detergents, or abrasive materials that could erode the nacre. If deeper cleaning is needed, immerse pearls briefly in lukewarm, mildly soapy water, then blot dry immediately with a lint-free cloth.
When storing pearls, isolate them from harder gemstones and metals to prevent surface scratching. Opt for a soft pouch or a separate compartment lined with velvet or silk within your jewelry box. Maintain moderate humidity; excessive dryness can cause nacre dehydration and cracking.
Inspect stringing and settings periodically to confirm secure, protective mounting.
Frequently Asked Questions
Can Pearls Be Reset if They Fall Out of Jewelry?
Yes, you can have pearls reset if they fall out of jewelry. Seek professional pearl resetting and jewelry repairs to guarantee secure adhesive application, precise drilling, and proper mounting techniques, preserving the pearl’s integrity and aesthetic value.
Are Imitation Pearls Set Differently From Real Pearls?
When you set imitation pearls, you often use adhesives, since their drilled holes and coatings differ from higher pearl quality real pearls, which require careful post-mounting and cushioning techniques to prevent nacre damage during jewelry assembly.
What Types of Jewelry Insurance Cover Pearl Damage?
You should evaluate insurance options like scheduled personal property policies, which specifically cover pearl damage. Confirm your insurer requires professional pearl valuation, as standard homeowners policies rarely offer adequate coverage for the unique risks pearls present.
How Can I Identify if My Pearls Are Genuine Before Setting?
Examine your pearls under magnification—genuine pearls display sharp pearl luster and subtle iridescence. Check for surface flaws and irregularities, as real pearls aren’t perfectly smooth. Rub two pearls together; authentic ones feel gritty, not slick.
Is It Safe to Set Pearls in Jewelry at Home or Use a Professional?
You might consider DIY pearl setting, but unless you’ve mastered techniques like adhesive application, post fitting, and torque control, it’s safer to trust a professional jeweler, who’ll guarantee proper seating, alignment, and prevent nacre damage.
Conclusion
By mastering precise handling, correct adhesives, and ideal settings, you’ll safeguard pearls’ nacre and structure during jewelry assembly. Always use non-abrasive tools, apply minimal pressure, and select settings that cradle rather than stress the gem. Clean, dry surfaces and high-quality epoxy guarantee lasting bonds. Whether gluing, drilling, or mounting in prongs, meticulous technique preserves luster and integrity. With these expert strategies, you’ll confidently set pearls without risk, guaranteeing both beauty and durability in your finished pieces.










Leave a comment
This site is protected by hCaptcha and the hCaptcha Privacy Policy and Terms of Service apply.